Experience the vibrant streets of Bangkok from your own kitchen with this authentic Thai Fried Pork (Moo Tod). This isn’t just another pork recipe; it is a masterclass in balancing salty, sweet, and umami flavors, all wrapped in a crispy, golden-brown crust. By utilizing the modern efficiency of an air fryer, we achieve those coveted charred edges and succulent centers without the mess of deep-fat frying.
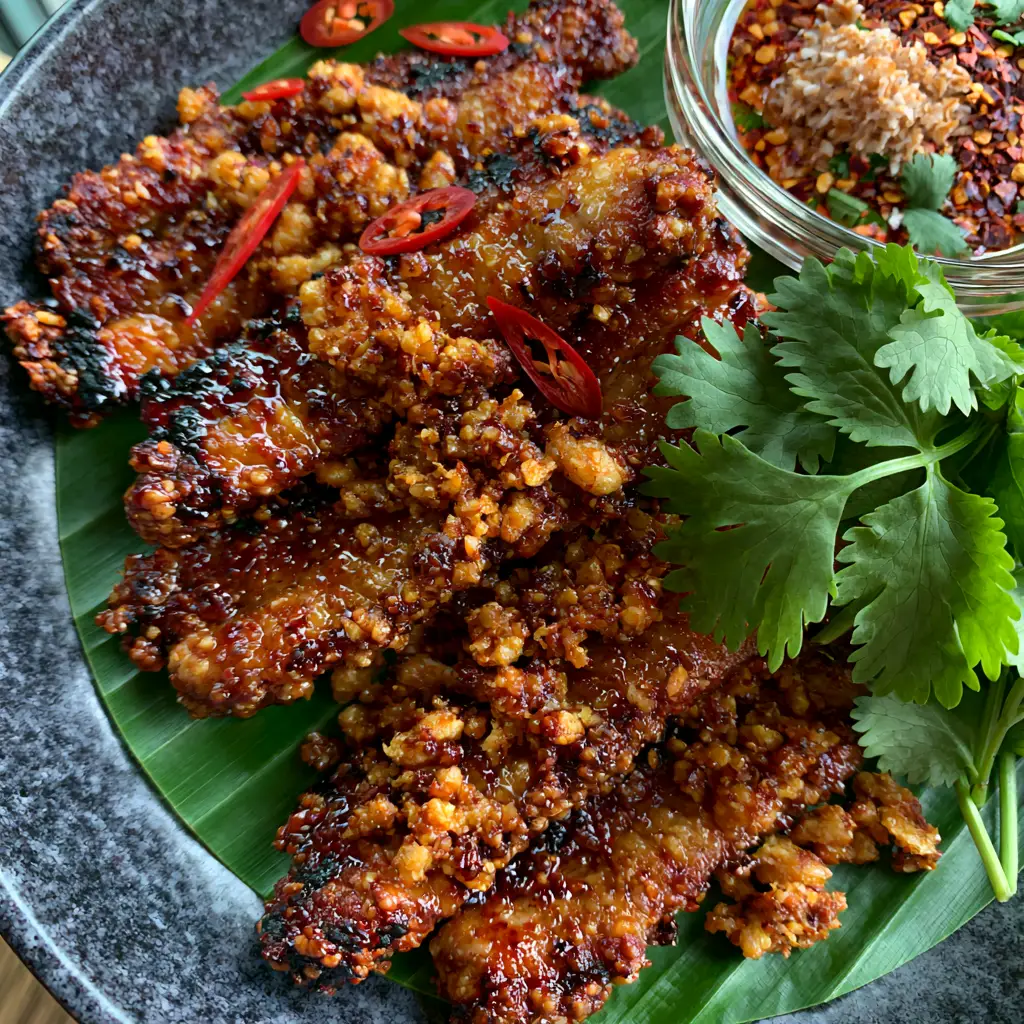
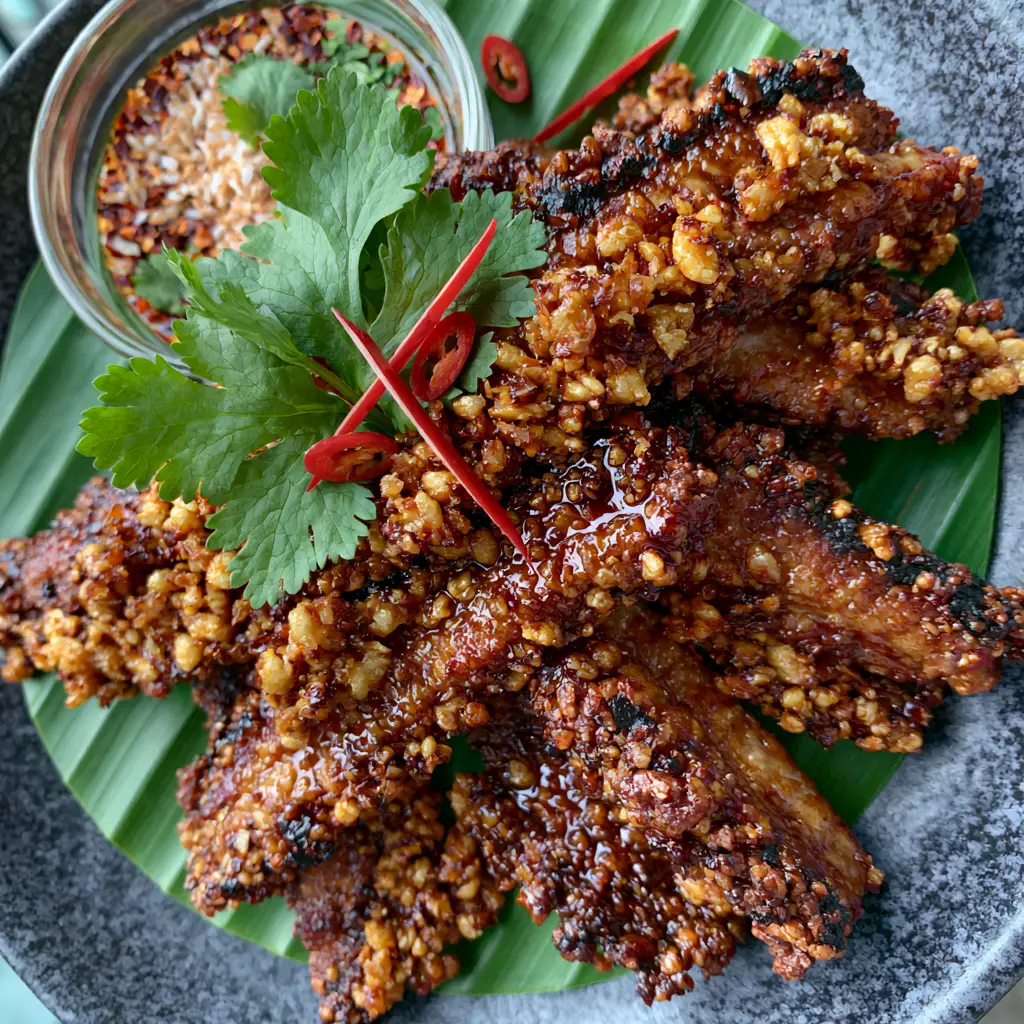
The visual appeal of this dish is as striking as its flavor profile. Imagine succulent strips of pork shoulder, glistening with a sticky oyster sauce glaze and encrusted with clusters of crunchy fried garlic. Served on a vibrant, waxy green banana leaf atop a dark charcoal ceramic plate, this Thai Fried Pork is a sensory journey that begins the moment you see it and culminates in a perfect bite dipped in spicy Nam Jim Jaew sauce.
Why This Air-Fried Moo Tod Is a Culinary Game-Changer
- Textural Perfection: We achieve a specific “shatter-crisp” exterior while maintaining a tender, fatty interior that melts in your mouth.
- Deep Umami Glaze: The combination of oyster sauce and soy sauce creates a glossy, mahogany finish that perfectly mimics traditional street food.
- Visible Garlic Clusters: Unlike recipes that use garlic powder, we use fresh, hand-minced garlic that transforms into golden, crunchy nuggets during the cooking process.
- Balanced Heat: The accompanying Nam Jim Jaew dipping sauce provides a smoky, tangy, and spicy contrast to the rich, savory pork.
- Healthier Technique: Using an air fryer reduces the oil content significantly while maximizing the Maillard reaction for those essential charred bits.
Creating a restaurant-quality Thai Fried Pork at home requires understanding the chemistry of the marinade. The sugars in the palm sugar and oyster sauce need to caramelize at exactly the right temperature to create the “glistening, sticky garlic-soy glaze” described in our visual blueprint. If you enjoy the balance of Thai flavors, you might also find inspiration in our Thai red curry noodle soup for your next meal prep session.
The Flavor Foundation: Essential Ingredients for Authentic Moo Tod
To achieve the specific visual and flavor results of this Thai Fried Pork, each ingredient must be selected and prepared with intention. We are looking for high-quality proteins and aromatics that can withstand the intense heat of the air fryer.
Pork Shoulder (Butt): 1.5 lbs (680g). This cut is non-negotiable because the intramuscular fat (marbling) is what keeps the strips succulent under high heat. Leaner cuts like loin will dry out before the edges can char.
Fresh Garlic: 10-12 cloves (45g). We don’t just use garlic for flavor; we use it for texture. By coarsely mincing the garlic, we create those “clusters” that stick to the meat and provide a satisfying crunch.
Oyster Sauce: 2 tbsp (30ml). This is the secret to the glossy sheen. It provides a thick, savory base that helps the other seasonings adhere to the pork strips.
Light Soy Sauce: 1 tbsp (15ml). For the essential saltiness and to deepen the golden-brown color during the air-frying process.
Palm Sugar or Brown Sugar: 1 tbsp (12.5g). Sugar is vital for the “deeply caramelized” result. It reacts with the heat to create that sticky, finger-licking coating.
White Pepper: 1 tsp (2g). This provides a subtle, floral heat that is characteristic of Thai street food, distinct from the sharper bite of black pepper.
Toasted Rice Powder (Khao Khua): 1 tbsp (10g). Used exclusively in the dipping sauce, this provides a nutty aroma and a gritty, authentic texture that defines Nam Jim Jaew.
Bird’s Eye Chilies: 3-4 chilies. These are used both in the sauce and as a fresh garnish, providing “thin diagonal slices” of vibrant red that pop against the green banana leaf.
For those looking to expand their Thai-inspired repertoire, serving this pork alongside a steaming bowl of fragrant coconut rice creates a complete, balanced meal.
Tools for Success: Achieving the Professional Visual
To recreate the handheld smartphone food photography aesthetic of this recipe, you need the right equipment. The air fryer is the star, but the presentation tools are equally important.
High-Performance Air Fryer: A basket-style air fryer works best here to ensure maximum air circulation around the pork shoulder strips. This is how we get those charred edges without flipping the meat constantly.
Mortar and Pestle: This is the traditional way to crush the garlic and bird’s eye chilies, releasing the essential oils for a deeper flavor profile than a food processor can provide.
Dark Charcoal Ceramic Plate: To make the colors of the Thai Fried Pork pop, a matte, dark background is essential. It provides a high-contrast canvas for the “vibrant green banana leaf.”
Sharp Chef’s Knife: Essential for slicing the pork into uniform strips and creating those delicate, diagonal chili garnishes.
The Master Method: Crafting the Perfect Thai Fried Pork
Follow these steps precisely to ensure your Thai Fried Pork matches the visual blueprint of deeply caramelized meat and golden garlic bits. The secret lies in the marinade time and the air-flow management.
Step 1: Preparing the Pork and Aromatics
Start by slicing the 1.5 lbs (680g) of pork shoulder into strips approximately 3 inches (7.5cm) long and 0.5 inches (1.25cm) thick. Consistency is key here; if the strips vary too much in size, the smaller pieces will burn before the larger ones reach the “succulent” stage.
In a mortar and pestle, pound the garlic cloves with a pinch of salt until they form a coarse paste with visible chunks. You don’t want a smooth puree; the chunks are what become the “clusters” in the final dish.
Step 2: The Infusion (Marinating)
In a large glass bowl, whisk together the oyster sauce, soy sauce, palm sugar, and white pepper. Add the pork strips and the crushed garlic. Use your hands to massage the marinade into the meat, ensuring every crevice is coated in the “sticky garlic-soy glaze.”
Let the pork marinate for at least 30 minutes at room temperature, or up to 4 hours in the refrigerator. If you’re in a rush, a quick 30-minute soak is enough, but longer marinating yields deeper color. While the pork marinates, you can prepare a side of chicken fried rice to round out your dinner menu.
Step 3: Creating the Nam Jim Jaew Sauce
While the pork develops flavor, prepare the dipping sauce. Mix 2 tbsp (30ml) of fish sauce, 2 tbsp (30ml) of lime juice, and 1 tsp (4g) of palm sugar in a small clear glass bowl. Stir in the toasted rice powder and red chili flakes.
Finish the sauce with a handful of chopped cilantro. The “visible flakes of toasted rice powder” should be prominent, as they provide the signature smoky crunch that cuts through the richness of the Thai Fried Pork.
Step 4: The Air Fryer Transformation
Preheat your air fryer to 400°F (200°C). Arrange the pork strips in a single layer in the basket. It is crucial not to overcrowd the basket; if the strips are touching, they will steam instead of fry, and you will miss out on the “charred golden-brown edges.”
Air fry for 10-12 minutes. At the 6-minute mark, shake the basket gently to redistribute the garlic clusters. Watch for the sensory cues: the fat should be sizzling loudly, and the aroma of toasted garlic should fill the room. The pork is done when it reaches an internal temperature of 145°F (63°C) and looks deeply caramelized.
Step 5: Plating for Visual Impact
Lay a piece of waxy green banana leaf onto your dark ceramic plate. Pile the hot Thai Fried Pork in the center, ensuring the garlic clusters are visible on top. Place the glass bowl of Nam Jim Jaew beside the meat.
Garnish with fresh cilantro sprigs and the diagonal slices of red bird’s eye chilies. The contrast between the bright red chilies and the deep brown pork creates a professional, high-end food photography look.
Expert Tips for the Ultimate Moo Tod
- The Sugar Secret: If your pork isn’t browning fast enough, add an extra teaspoon of palm sugar to the marinade next time. Sugar is the primary driver of the Maillard reaction in this recipe.
- Garlic Timing: If your garlic is burning before the pork is cooked, try mincing it slightly larger. Larger pieces take longer to brown.
- Rice Powder Freshness: Always toast your rice powder right before using it in the Nam Jim Jaew. The aroma fades quickly once ground.
- Room Temp Meat: Take the pork out of the fridge 20 minutes before air frying. This ensures even cooking and better searing.
If you’re looking for more protein-heavy inspirations after mastering this pork, check out our guide on high-protein meals to keep your weekly menu balanced and exciting.
Storage and Reheating Guidelines
Thai Fried Pork is best enjoyed immediately while the garlic is at its peak crispiness. However, leftovers can be stored in an airtight container in the refrigerator for up to 3 days.
To reheat, avoid the microwave, as it will make the pork rubbery and the garlic soft. Instead, place the strips back in the air fryer at 350°F (175°C) for 3-4 minutes. This will revive the “glistening glaze” and restore the crunch to the exterior.
While this dish doesn’t freeze particularly well due to the delicate nature of the fried garlic, you can freeze the marinated (uncooked) pork for up to a month. Just thaw completely in the fridge before air frying.
What to Serve With Thai Fried Pork
To create a full Thai “Khao Gaeng” (curry and rice) experience, pair this dish with a variety of textures and temperatures. The richness of the pork shoulder cries out for something bright and acidic.
- Sticky Rice: The traditional accompaniment. Use the rice to mop up the extra Nam Jim Jaew sauce.
- Fresh Vegetables: Sliced cucumbers and long beans provide a cooling crunch.
- Sweet Treats: After a spicy meal, our mango cakes offer the perfect tropical finish.
- Savory Sides: If you’re serving a crowd, a side of chicken tinga can provide a cross-cultural fusion of bold, spicy meats.
Frequently Asked Questions
While you can, pork loin is much leaner and may become dry in the air fryer before the edges achieve that signature char. Pork shoulder is recommended for the best texture.
The key is not to overcrowd the air fryer basket. Cook in batches if necessary to ensure hot air can circulate around every single strip.
Keep your garlic pieces coarsely minced rather than finely pasted. The larger surface area allows them to crisp up at the same rate the pork cooks.
To make it gluten-free, ensure you use a certified gluten-free oyster sauce and soy sauce (or tamari), as standard versions often contain wheat.
Toasted rice powder (Khao Khua) adds a unique nutty flavor and crunch to the dipping sauce. If skipped, the sauce will lose its authentic smoky depth and texture.
Authentic Air-Fried Thai Garlic Pork (Moo Tod) Recipe
Thai Fried Pork: The Ultimate Crispy Air-Fried Moo Tod Recipe
Ingredients
Equipment
Method
- Slice the pork shoulder into even 3-inch strips. Ensure they are roughly the same thickness for even air frying.
- Combine oyster sauce, soy sauce, sugar, white pepper, and crushed garlic. Massage into pork and let sit for 30 minutes.
- Place pork in a single layer in the air fryer at 400°F (200°C). Fry for 10-12 minutes until charred and glistening.
- Whisk fish sauce, lime juice, sugar, chili flakes, and toasted rice powder in a small glass bowl.
Notes
Use pork shoulder specifically for the fat content that prevents drying out.
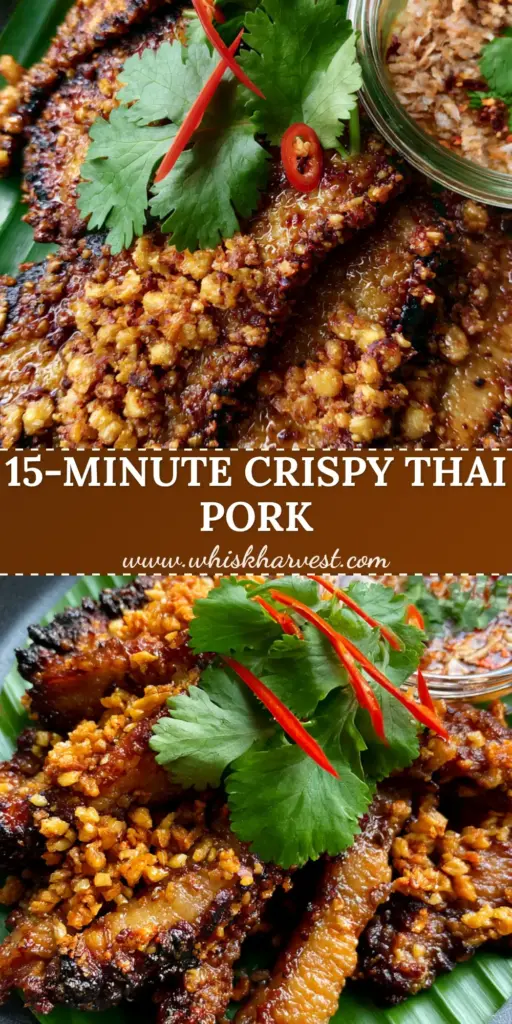
This Thai Fried Pork recipe brings the authentic flavors of Southeast Asian street food into the modern home kitchen. With its perfect balance of sweet caramelization and savory garlic crunch, it’s a dish that impresses both the eyes and the palate. The air fryer method ensures you get the “handheld smartphone food photography” results every time—succulent, charred, and utterly delicious.
If you loved this recipe, please leave a comment below and let us know how your garlic clusters turned out! Don’t forget to share your creations and follow us on Pinterest for more culinary inspiration and visual recipe guides. Happy cooking!